Hi Friends!
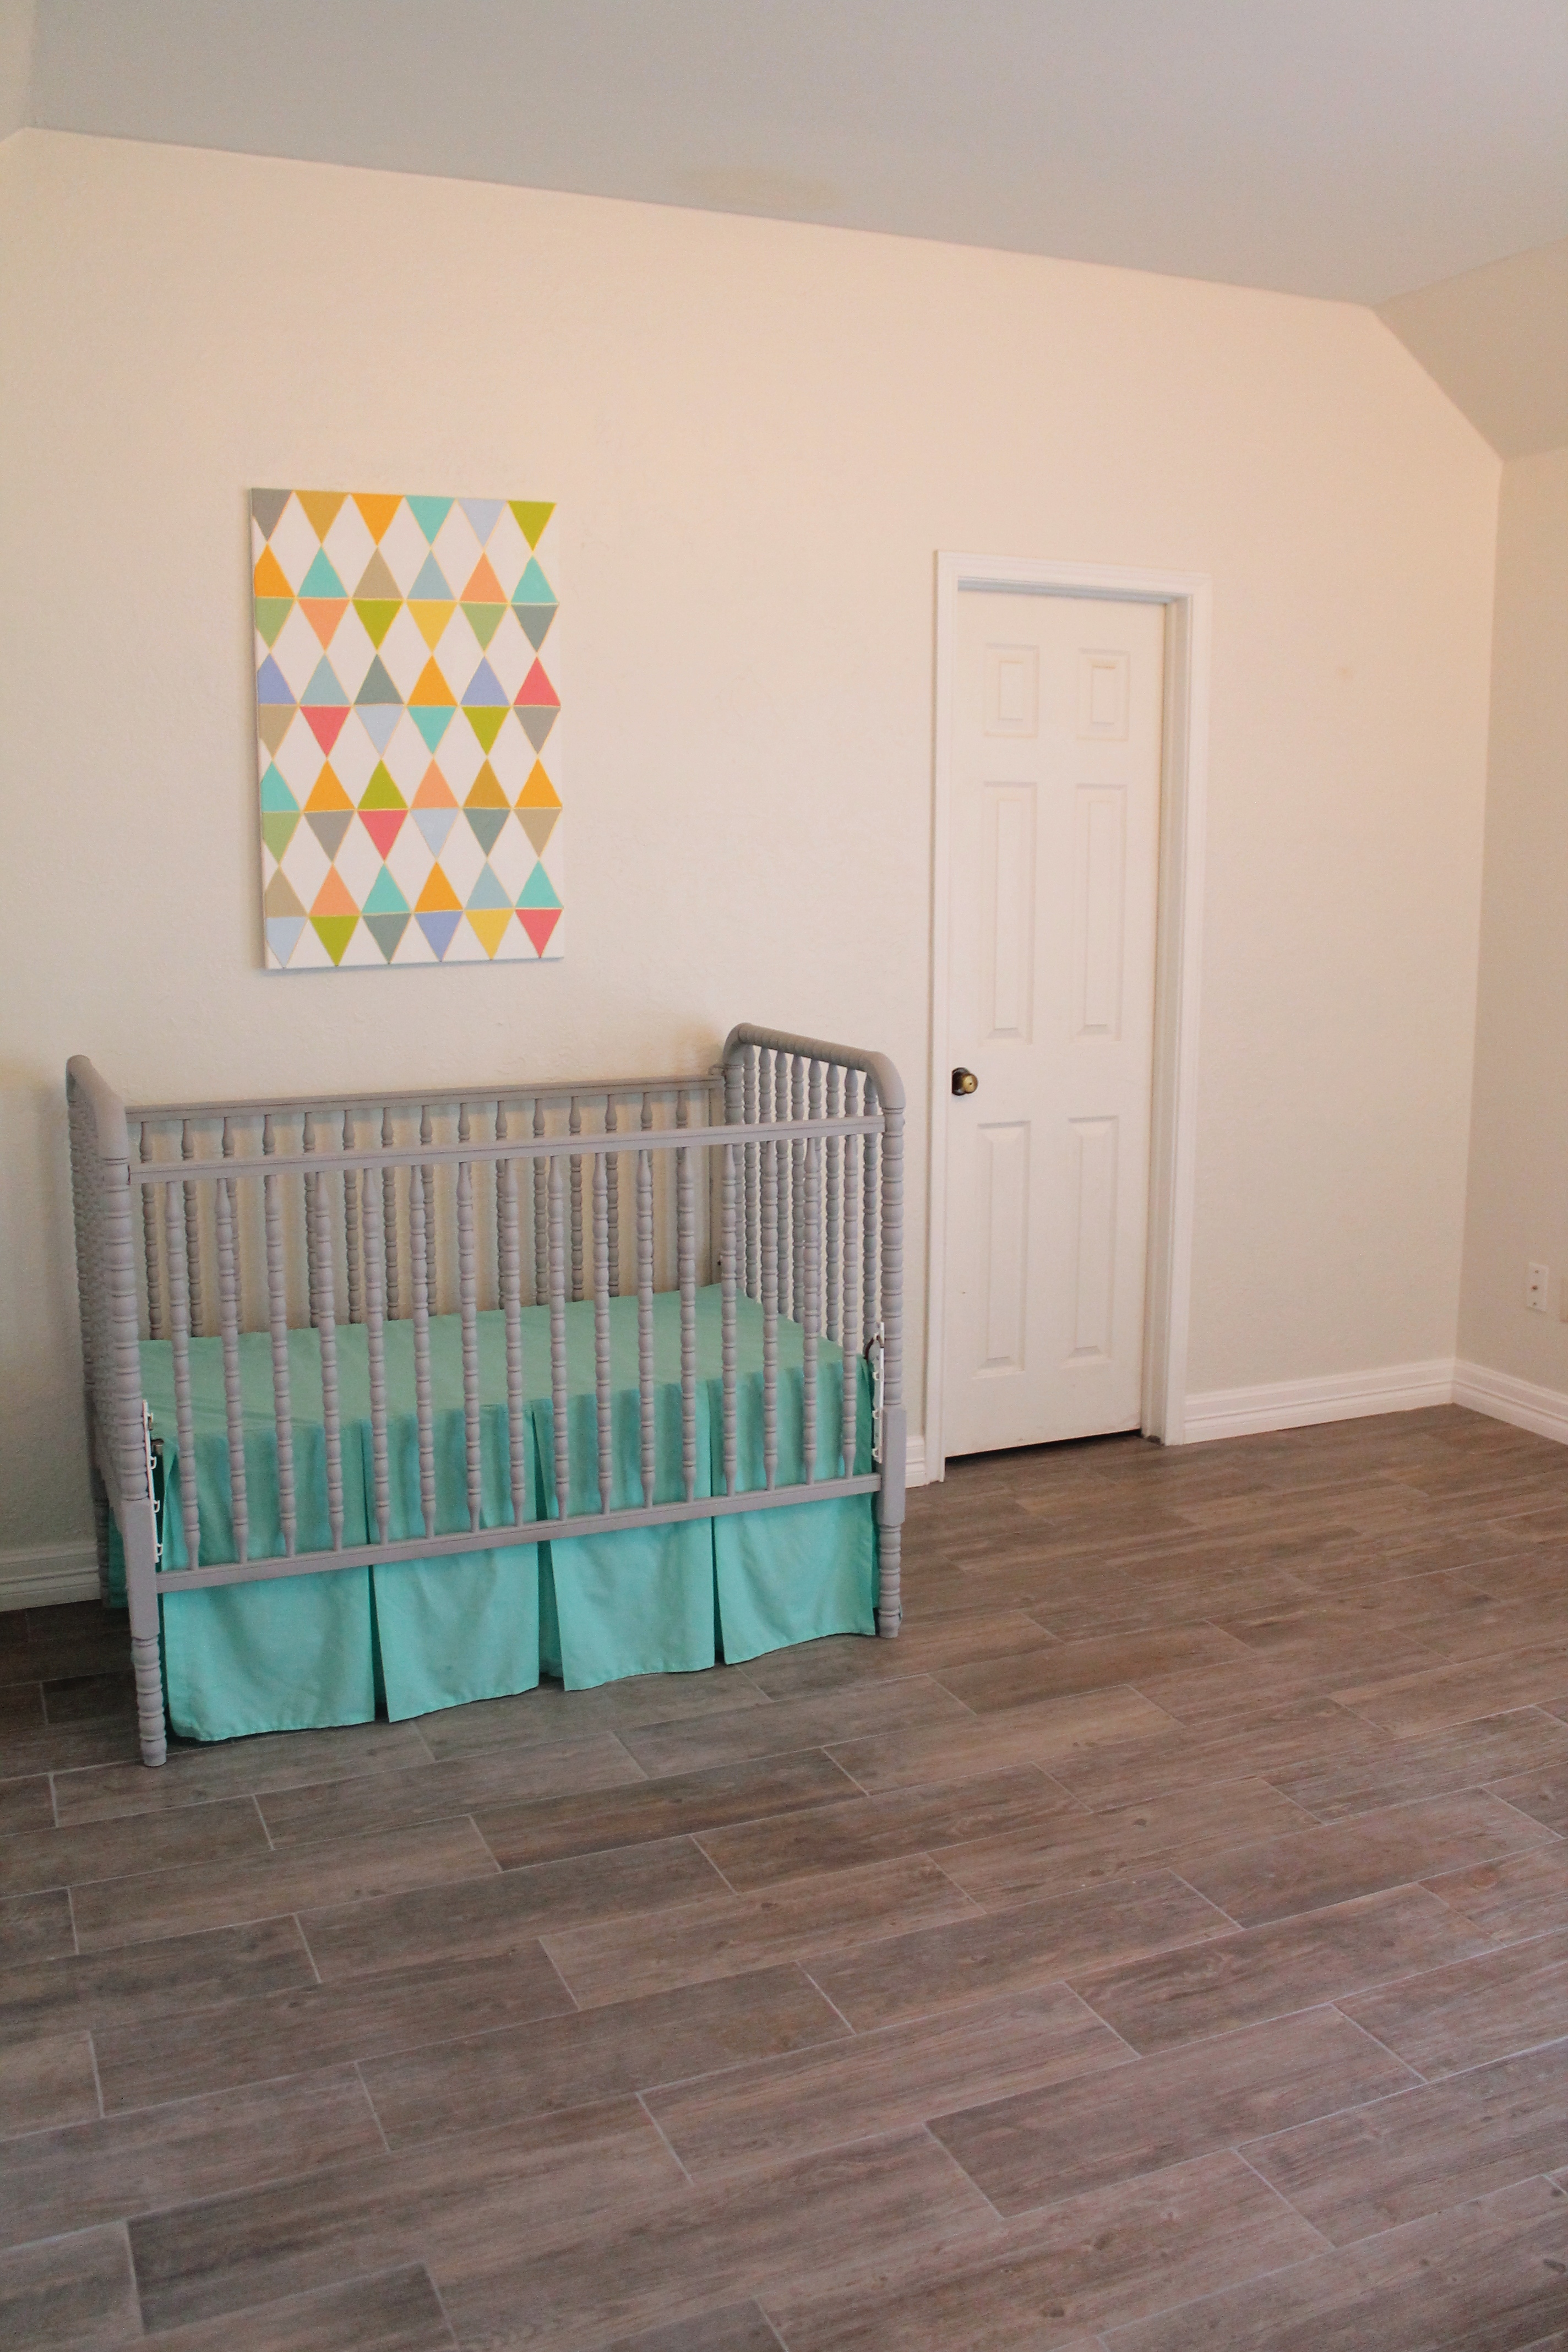
Today I am humbly sharing our recent DIY project where we partnered with our favorite home improvement store Lowe’s and laid ceramic to re-do our former guest bedroom into our nursery!
Most people are a little skeptical when it comes to DIY home projects because it just seems complicated and hard, but the husband and I are DIY veterans so we knew we could handle it.
Huge shout out and thank you to Lowe’s for partnering with us on this project! This is the tile we chose to use, click HERE.
Lowe’s has always been our go-to store for every project you can imagine that we have done in our home. From other tiling projects (our master bathroom, fireplace, and kitchen backsplash) to painting our entire house. Lowe’s always has what we need for every project!
Shopping/supply list:
- Tile
- Thinset/mortar
- Drill
- Mixer attachment
- 3-5 gallon buckets (one for thinset, grout, and water to clean up)
- Notched trowel
- Spacers
- Wax pencil for measuring and marking tiles
- Measuring tape
- Wet saw- search for a local place to rent one from!
- Safety goggles and mask
- Grout
- Grout float
- Multiple heavy duty sponges
- Glass of sweet iced tea- for when your back needs a break!
So to begin:
You need to clear out your room: furniture, baseboards, and even dirt. So give the whole room a good cleaning. Please forgive the gross orange looking color around the baseboard area, we had actually acid-stained our concrete several years ago, and that was residual from when we applied it!
(Please note if you have other flooring like carpet, laminate, etc you’ll want to make sure everything is removed, the concrete slab needs to be completely smooth.)
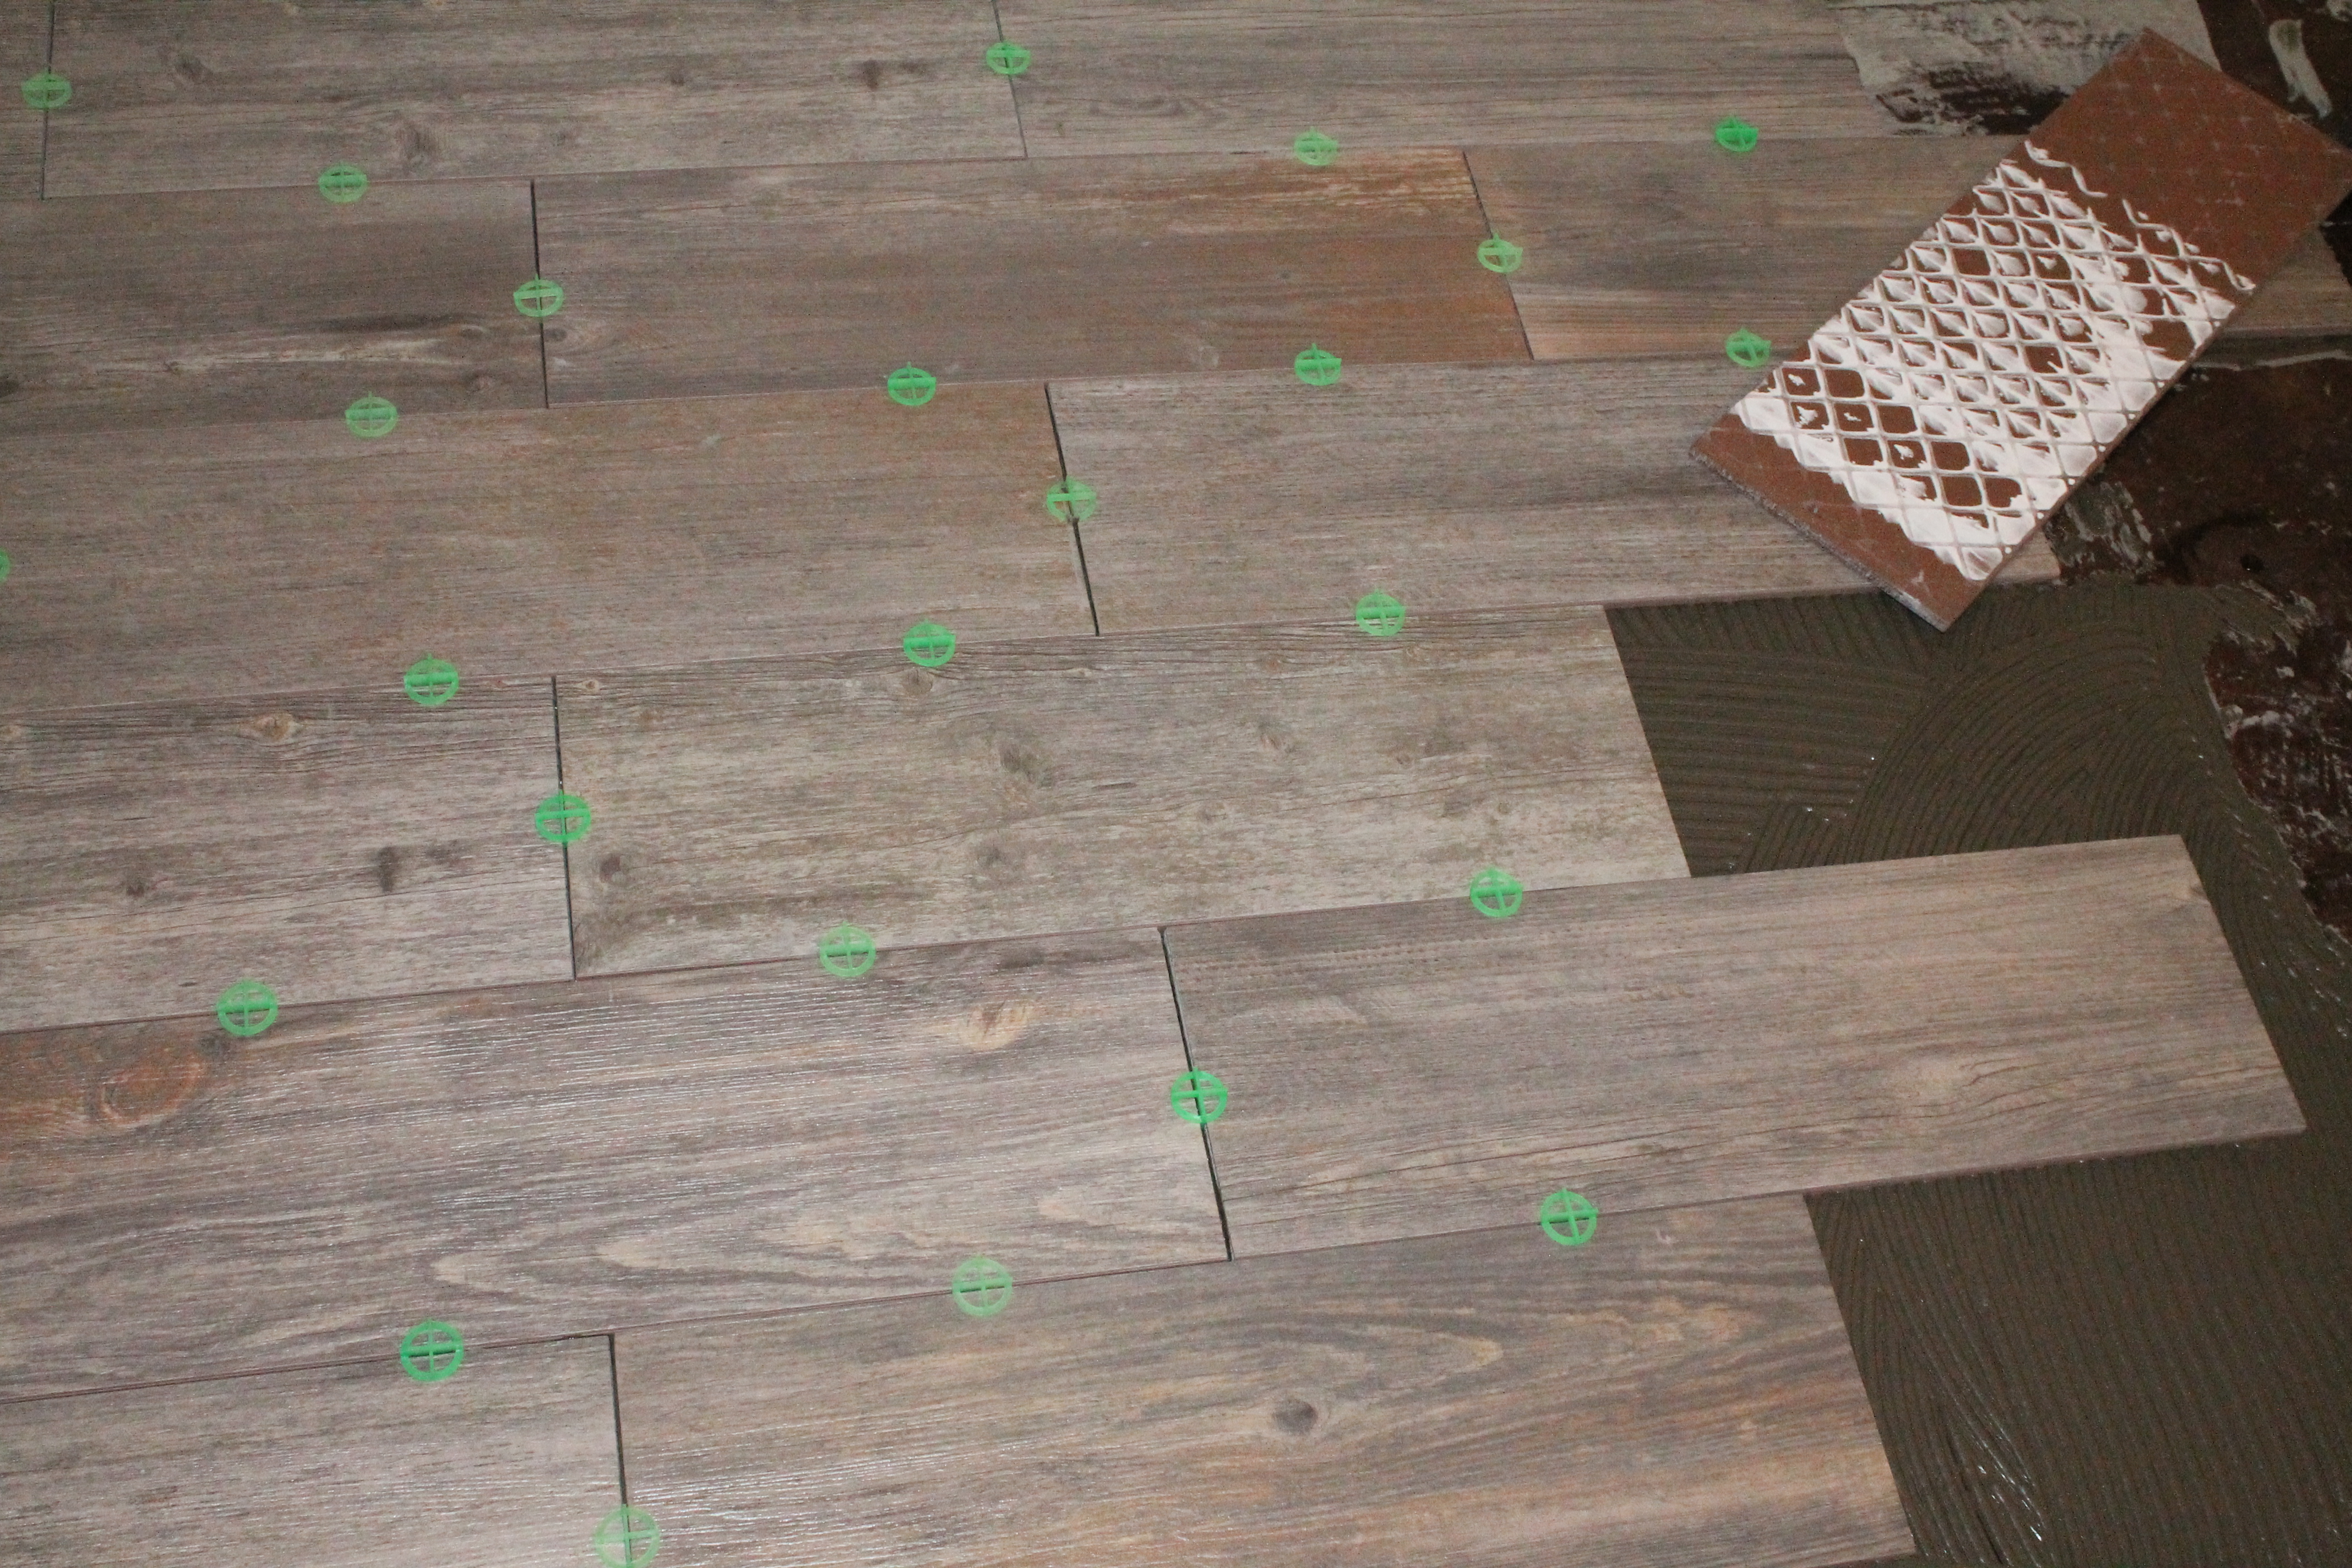
Next you’ll want to bring in a few tiles for a “dry-fit” because trust me, you want to measure twice and cut once. (We also tiled the bathroom as well, so we decided to start at the bathtub with a full piece. You want to make sure you work your way out of the room. Meaning you don’t want to be walking on the tile after it’s freshly laid down, the mortar needs time to dry)

Once you have your dry-fit started it’s time to mix up the mortar that will act like the glue that holds the tile to the concrete.
Make sure to use a mask to cover your eyes and nose to protect yourself.
The way we mixed it was adding some water to a five gallon bucket, about a few inches, then adding some mortar mix and mixing it with our drill with a long mixer attachment to get to the consistency of peanut butter. We also didn’t mix up the entire bag simply because it begins to set too fast and we didn’t want to end up wasting the thin-set/mortar.
Peanut butter consistency folks. Not too wet because those notches you see on the side of the trowel will create a suction for the tile that will hold the tiles in place until it dries.

Next you will scoop out some mortar with your trowel and “wipe” it across the concrete slab. I didn’t get a good picture of this so I borrowed one from remodelthishouse.com

You want to make sure you work in small areas, but that you work in large enough areas so that you can lay down full tiles as you go. You want a consistent amount of thinset/mortar underneath every single tile.
Once you lay down your first and second tile you will use your spacers to insure you keep everything straight and lined up.
And then you’re off, just keep repeating applying more thinset and laying more tiles and inserting more spacers, until you are all the way out your door. This is such an easy sentence to type, but when you have to stop to measure and make cuts on the wet saw you will definitely get a workout!
Once you completely finish and celebrate with a dance party after you lay the final tile, make sure to refrain from walking on the tile for atleast 24 hours. You want to make sure everything is dry and set.
Then it is time to grout! You can now remove all your spacers because the tile should be set and won’t move around when you walk over it.
We chose this grout, pearl gray, from Lowe’s because it would blend well with the coloring in the tile.
You want to mix up your grout with water just like you did with the thinset to the same consistency of peanut butter.
You will then scoop out (or pour out which is how I did it!) a bit of grout and take a grout float and start spreading out the grout making sure to get it into each grout line, starting in the same place you started your tiling.
I was actually home by myself when I grouted so I wasn’t able to get any action shots, so I borrowed this one from bobvila.com!

Image from bobvila.com
Once you work your way back out, you can then go back where you began with a big bucket of warm water, a sponge, and I used rubber gloves because the grout is not easy on the hands nor did I want to risk absorbing anything in my skin that could harm Baby girl.
You will then start the process of cleaning the excess grout off the tile making sure not to use too much water because you want the grout to stay in the grout lines; you are just wiping off the residual grout from the top of your pretty new tile! This will take patience and about 3-4 trips across your entire floor! Just wet your sponge and starting wiping off the excess grout, then rinsing your sponge, and repeating…a lot. 🙂
Once you are finished another dance party is required y’all! You just finished tiling and grouting a complete floor! Be proud of yourself!

Special thanks again to Lowe’s for being a part of our DIY tiling project for Kerrington Snow’s nursery!
I can’t wait to share the final reveal of how all the decor turned out!
Until next time,
xoxo, Tamara